
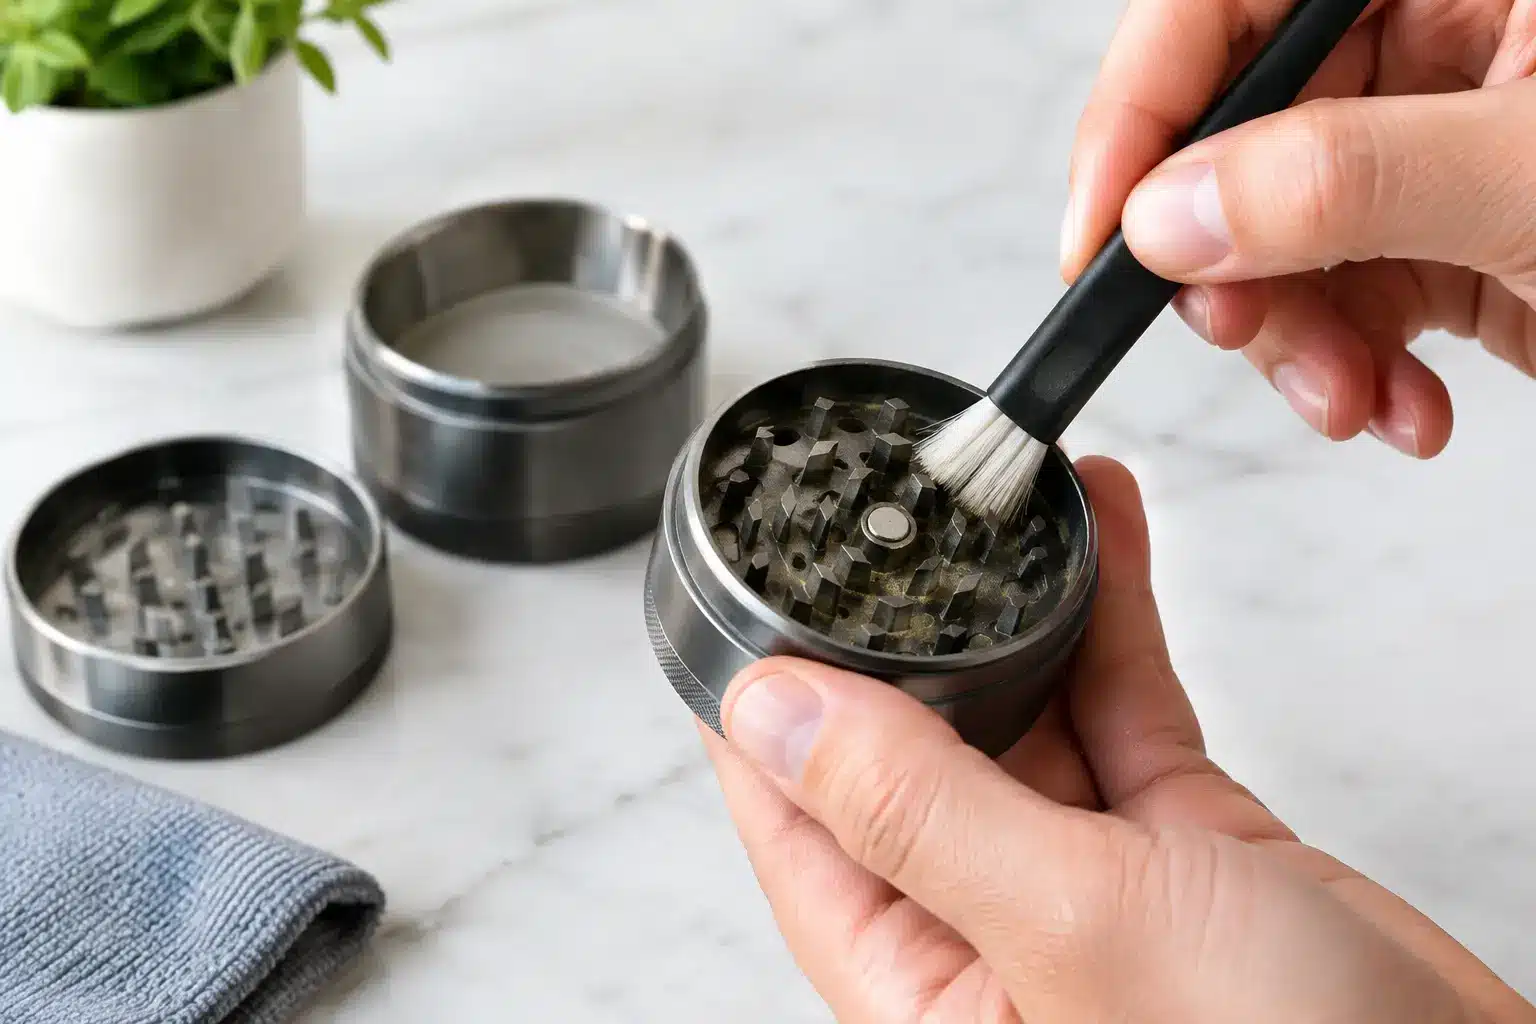
A grinder that suddenly feels stiff, tears herb instead of cutting it, or leaves chunks trapped around the lid usually has one problem: resin buildup. Knowing how to clean grinder teeth correctly restores the sharp, consistent action your herb grinder was designed to deliver. It also prevents the kind of forced twisting that wears out cheap grinders, damages threads, and turns a simple prep step into a frustrating chore.
Premium CNC-machined aluminum grinders need far less attention than poorly made cast-metal models. Precise tooth spacing gives material room to move through the cutting chamber instead of packing into random gaps. Still, dried herb contains sticky trichomes, and every grinder eventually needs a proper clean. The key is removing buildup without scratching the finish, clogging the screen, or contaminating the grinder with residue from harsh cleaners.
Why Grinder Teeth Get Clogged
Grinder teeth do not become dull overnight. In most cases, they become coated. Warm hands, a warm grinder, fresh herb, and repeated use create a sticky film that collects around the base of every tooth. Fine plant material then sticks to that film, narrowing the open space between teeth and making the grinder harder to turn.
This is especially noticeable with dense, resinous flower. If you load too much material at once, force the lid closed, or grind herb that is overly moist, the buildup happens faster. The grinder may still turn, but the texture becomes less consistent. Rather than a light, even grind, you get compressed clumps and larger pieces that escaped the teeth.
A well-made grinder should cut cleanly with controlled pressure. When it starts demanding force, do not muscle through it. Cleaning the teeth early is faster than trying to break loose a heavy layer of hardened resin later.
What You Need to Clean Grinder Teeth
For routine maintenance, a stiff nylon brush and a wooden toothpick are usually enough. A small cleaning brush works well because its bristles reach the narrow areas between precision-cut teeth without gouging the aluminum. A toothpick is useful for lifting compacted plant matter from corners and around the edge of the grinding chamber.
For a deeper clean, use 91% or higher isopropyl alcohol, cotton swabs, a clean microfiber cloth, and a shallow glass container. Higher-proof isopropyl alcohol cuts resin more effectively and evaporates quickly when the grinder is dried properly.
Avoid steel wool, knives, screwdrivers, abrasive scouring pads, and aggressive wire brushes. Those tools can scratch aluminum, damage an anodized finish, or leave fine debris behind. The goal is to remove resin, not machine the grinder a second time.
How to Clean Grinder Teeth Step by Step
Start by fully disassembling the grinder. Separate the lid, grinding plate, collection chamber, and screen section if your grinder has one. Work over a clean tray or sheet of paper so any loose herb or kief stays contained rather than ending up on the floor.
First, tap each piece gently to release dry material. Use the nylon brush to sweep around the teeth, working from the center outward. Brush the underside of the lid as carefully as the lower teeth. Resin accumulates on both surfaces, and leaving one side coated will bring the problem back quickly.
If material is wedged between individual teeth, use a wooden toothpick to loosen it. Keep the tip angled away from the tooth edges and use light pressure. Do not pry hard against the teeth. A precision grinder has tight tolerances for a reason, and forcing a tool through a packed area is never the right fix.
For moderate residue, dampen a cotton swab with isopropyl alcohol and wipe each problem area. The swab should be damp, not dripping. Focus on the tooth bases, the outer rim where the lid meets the grinder, and any area that feels tacky to the touch. Replace swabs as they pick up resin instead of spreading it across the surface.
For heavy buildup, place the metal grinding components in a shallow glass container with enough isopropyl alcohol to cover the affected teeth. Let them sit for 15 to 30 minutes. The exact time depends on how much residue is present. A lightly used grinder may need only a brief soak, while a grinder with months of neglected buildup may need the full half hour.
After soaking, brush the teeth again. Resin should release with minimal effort. Wipe every part with a clean cloth, then let all components air-dry completely before reassembly. Alcohol evaporates fast, but the grinder should feel and smell fully dry before herb touches it.
Be Careful With Screens and Finish Details
If you use a 4-piece grinder with a kief screen, treat that screen differently from the teeth. Do not scrub it aggressively or press a brush into the mesh. A damaged screen defeats the purpose of a multi-chamber grinder and can allow more plant matter into the collection chamber.
Instead, turn the screen section upside down and lightly brush away loose particles. If the mesh is sticky, use a cotton swab with a very small amount of isopropyl alcohol around the edges and underside. Let it dry completely. Avoid soaking a screen if it has adhesive components, decorative inserts, or manufacturer-specific finishing details that are not intended for prolonged alcohol exposure.
Most quality aluminum grinders can handle a careful alcohol clean, but the finish matters. If your grinder has custom artwork, painted elements, or a finish you are unsure about, test a small hidden area first. A premium grinder deserves premium care, not blind trial and error.
Do Not Use Water as Your Main Cleaning Method
Warm water may loosen some surface debris, but it does not dissolve sticky resin nearly as well as isopropyl alcohol. It can also leave moisture in threads, under screens, or in tight-fitting components. If water is used at all, it should be a quick rinse after cleaning, followed by thorough drying.
Never store a grinder while it is wet. Even durable 6061-T6 aluminum is better kept clean and dry, especially around moving contact points. Moisture can trap fine plant particles and create a paste-like buildup the next time you load the grinder.
Freezing is another popular trick, but it is not a complete cleaning method. A brief period in the freezer can make some residue more brittle and easier to brush away. It will not remove oily resin from the teeth, and repeated temperature cycling is unnecessary when a proper brush and alcohol clean will do the job correctly.
Keep Your Grinder Cutting Clean Between Deep Cleans
The best way to avoid a long cleaning session is to stop buildup before it becomes a problem. Empty the grinding chamber after use instead of leaving ground herb pressed against the teeth. Break up oversized buds before loading them, and avoid overfilling the grinder. A packed chamber does not grind faster. It creates friction, compresses herb, and puts unnecessary stress on the cutting surfaces.
A quick brush every few sessions is usually enough for regular users. Heavy daily users may want to wipe the teeth and rim weekly, then perform a deeper alcohol clean every few weeks. The right schedule depends on the flower you use, how full you load the grinder, and whether you prefer sticky, high-resin cultivars.
Pay attention to the turning feel. A clean, properly built grinder should close smoothly and rotate with confidence, not wobble, bind, or require a two-handed fight. If the action changes, inspect the teeth and the contact rim before assuming the grinder itself has failed.
The Grinder Build Matters as Much as the Cleaning
Cleaning can rescue a dirty grinder, but it cannot fix poor engineering. Thin cast metal, blunt teeth, loose tolerances, and rough threads give resin more places to collect and make every cleaning job harder. That is why serious users look beyond color and graphics when choosing a grinder.
Tahoe Grinder Co builds its grinders in-house from 6061-T6 aluminum with CNC-machined teeth, controlled tolerances, and thread-less magnetic designs on select models. Those details are not decoration. They create a more controlled grind, reduce the frustration of sticking components, and give you a tool built to stay in rotation for years rather than months.
A grinder should be easy to maintain because it was engineered correctly from the start. Clean it before resin turns into a performance problem, use tools that respect the finish, and let sharp, precisely machined teeth do what they were made to do: cut herb evenly without a fight.