
A grinder that takes 30 seconds too long, clogs after a few sessions, or shreds your flower into dust stops being a convenience and starts being the weak link in your setup. That is exactly why the manual grinder vs electric grinder question matters more than most buyers think. This is not just about effort versus ease. It is about grind consistency, control, maintenance, long-term durability, and how your herb actually burns, packs, and tastes.
For dried herb users, the grinder is not an accessory you notice only when you buy it. You notice it every time it turns smoothly, every time it sticks, and every time it gives you a fluffy, even result instead of a powdery mess. So if you are deciding between manual and electric, the right answer depends on how you use your flower and how much control you want over the process.
Manual grinder vs electric grinder: the real difference
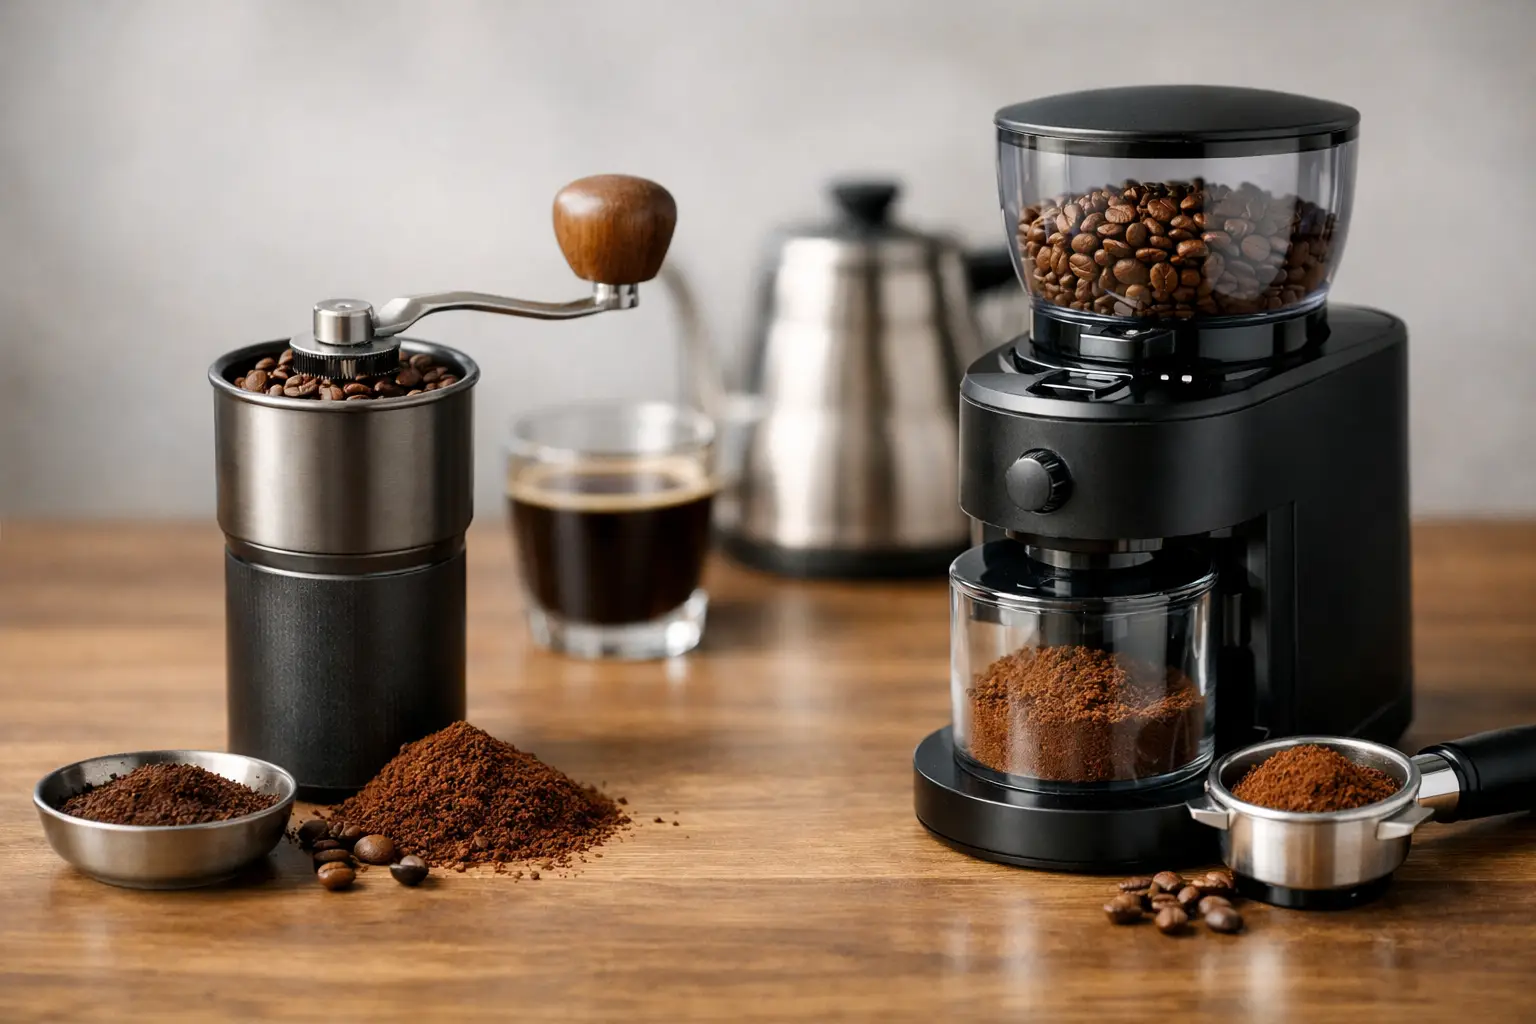
At a basic level, a manual grinder relies on hand force. You load the herb, twist the halves, and the teeth break the material down to your preferred texture. An electric grinder uses a motorized mechanism to do the work for you, usually with the press of a button.
That sounds simple, but the difference in performance is bigger than the product category suggests. Manual grinders give you direct control over the grind. You can stop early for a chunkier texture, keep going for a finer consistency, and feel resistance as the flower breaks down. Electric grinders prioritize speed and low effort, but they often remove that level of tactile control.
For serious cannabis users, that trade-off matters. The texture of your grind changes airflow, burn rate, bowl packing, and rolling performance. A grinder is not just reducing size. It is preparing the material for the session you actually want.
Why manual grinders usually win on control
If your goal is a consistent, usable grind without over-processing the flower, a high-quality manual grinder has a major advantage. You control the number of turns, the pressure, and the stopping point. That makes it easier to preserve a fluffy texture for bowls or dial in a finer grind for rolling.
Electric grinders can work well for quick prep, especially if you have mobility limitations or simply do not want to put any force into the process. But many of them move from whole flower to over-ground material fast. Once a motor is doing the work, it is easy to lose the texture sweet spot.
That matters because flower that is too fine can burn too hot, pull through screens, or roll too densely. Flower that is too coarse can create uneven burns and poor airflow. A precision manual grinder gives you a more predictable middle ground, which is exactly what most users want day after day.
There is also the question of feel. Cheap manual grinders are frustrating. They bind, cross-thread, dull quickly, and create uneven results. But a properly machined aluminum manual grinder is a different class of tool. Smooth rotation, sharp tooth geometry, and tight tolerances make the process fast without giving up control.
Electric grinders are about convenience first
Electric grinders appeal for obvious reasons. They are easy to use, especially when you are grinding larger amounts or want a no-effort option. If hand strength is an issue, electric can be the more accessible choice. That is a legitimate advantage, not a minor footnote.
But convenience is not the same thing as better performance. Many electric units introduce extra failure points: batteries, charging ports, switches, motors, and internal components that wear out. If the grinder stops powering on, jams internally, or loses torque, the entire tool is compromised.
There is also more variation in output. Some electric grinders chop aggressively, some pulse unevenly, and some leave a mix of dust and larger pieces in the same batch. That inconsistency can be frustrating if you care about a reliable smoke every time.
For occasional users, that may not be a dealbreaker. For daily users, it usually becomes one.
Grind quality matters more than speed
The biggest mistake buyers make in the manual grinder vs electric grinder debate is focusing only on speed. Yes, electric grinders can be faster in raw operation. But the real question is whether the final grind is better.
In most cases, grind quality has a bigger impact on the session than shaving off a few seconds of prep. A consistent grind promotes better airflow, smoother packing, and more even combustion. That means less wasted flower and a more predictable experience.
A premium manual grinder built from CNC-machined aluminum typically produces a more uniform result because the teeth, chamber fitment, and rotation are engineered for controlled material breakdown. That level of precision is difficult to fake. It shows up in how smoothly the grinder turns and how repeatable the output feels from one session to the next.
That is one reason serious users often stay with manual grinders even after trying electric options. They are not chasing novelty. They are chasing performance.
Maintenance and cleanup are part of the decision
No grinder stays perfect if it is never cleaned. Resin buildup happens. Fine plant matter accumulates. Threads and teeth collect debris. The question is how easy the grinder is to service.
Manual grinders are generally simpler to clean and easier to keep running for years. Fewer parts mean fewer things to fail. If the grinder is well made, disassembly is straightforward, and there are no electronics to protect.
Electric grinders are more complicated by design. You have to think about charging, battery health, motor wear, and whether certain parts can even be safely cleaned. Some electric units are not built with long-term maintenance in mind. Once residue works its way into a hard-to-reach area, performance can drop quickly.
That is where build quality separates disposable gear from equipment worth owning. A grinder should be designed to handle repeated use, not just look good in a product photo.
Cost, lifespan, and actual value
Electric grinders often look attractive if the selling point is ease of use. But value is not just about the purchase price. It is about how long the tool performs at a high level and whether it keeps doing the job without becoming unreliable.
A premium manual grinder can cost more than a bargain-bin option, but it usually earns that price through material quality, tighter machining, better durability, and a longer service life. If it turns smoothly, resists wear, and keeps producing a consistent grind for years, it is the better investment.
That is especially true when the grinder is made from real performance materials like 6061-T6 aluminum instead of cheap cast metal or low-grade mixed alloys. Precision machining matters. Tooth profile matters. Fitment matters. These are not cosmetic details. They are the difference between a grinder that performs like a tool and one that feels disposable.
Electric grinders can justify their price for users who need push-button convenience. But if you are comparing long-term reliability, many manual grinders have the edge simply because there is less to break.
Which grinder is better for your routine?
If you want maximum control, consistent texture, easier maintenance, and long-term durability, a manual grinder is usually the stronger choice. That is particularly true for users who care about grind quality and want a tool that feels solid every time they use it.
If ease of use is your top priority, or if hand strength and mobility make twisting difficult, an electric grinder may be the better fit. There is no reason to ignore accessibility just to chase a traditional setup.
But for most cannabis consumers who want the best balance of control, consistency, and lifespan, manual wins. Not because it is old-school. Because it gives the user more command over the result while avoiding the extra complexity that comes with motors and batteries.
That is why brands built around serious grinder performance, including Tahoe Grinder Co, focus so heavily on machining quality, aluminum construction, and repeatable output. The best manual grinders are not simple because they are basic. They are simple because they are refined.
The better question than manual grinder vs electric grinder
Instead of asking which type sounds easier, ask which type will still perform after months of daily use. Ask which one gives you the texture you actually want. Ask which one is built like a real tool, not a gadget.
If your grinder is something you use constantly, the right choice is the one that makes every session cleaner, faster, and more consistent without introducing new problems. For most users, that points straight toward a well-made manual grinder.
Buy for performance, not novelty. Your flower deserves better than a grinder that treats precision like an afterthought.