
A grinder usually tells you when it needs attention before it fully fails. The teeth stop slicing cleanly. The lid drags instead of turning freely. Threads feel gritty. Resin starts building around the rim, and suddenly a tool that should make prep faster turns into one more thing fighting you. A proper weed grinder maintenance guide is not about babying your gear. It is about protecting grind quality, keeping movement smooth, and making sure your grinder performs like a precision tool instead of a sticky afterthought.
Why grinder maintenance matters
Cheap grinders train people to expect decline. They gum up fast, wobble under pressure, and eventually feel disposable. A well-machined grinder is different, but even premium aluminum needs routine care if you want consistently clean cuts and reliable rotation.
Maintenance affects more than feel. It changes the texture of your herb, the ease of packing, and how much material gets trapped where it should not. When resin and plant dust collect around the teeth and contact surfaces, your grinder has to work harder. That extra resistance can make the grind less even, especially if you are dealing with stickier flower.
There is also a simple ownership reality here. If you buy a serious grinder, you should treat it like a serious tool. Regular upkeep protects the machining, reduces unnecessary wear, and keeps every chamber doing its job.
Weed grinder maintenance guide basics
The right maintenance schedule depends on how often you use your grinder and what kind of flower you put through it. Dry herb leaves behind less residue than fresh, sticky material. A daily user might need quick cleaning every few sessions and a deeper reset every couple of weeks. A lighter user can usually stretch that timeline.
The key is not waiting until the grinder is nearly seized. Light, frequent maintenance is easier and safer than aggressive scraping after heavy buildup has hardened.
What to watch for
If your grinder is due for cleaning, the signs are obvious. Rotation feels rough or uneven. The lid no longer glides the way it used to. Teeth look coated instead of defined. Chamber edges collect dark residue. In threaded models, the threads start feeling packed or resistant. In magnetic designs, the mating surfaces can still get dirty even without threads, so smooth fitment still depends on keeping those areas clean.
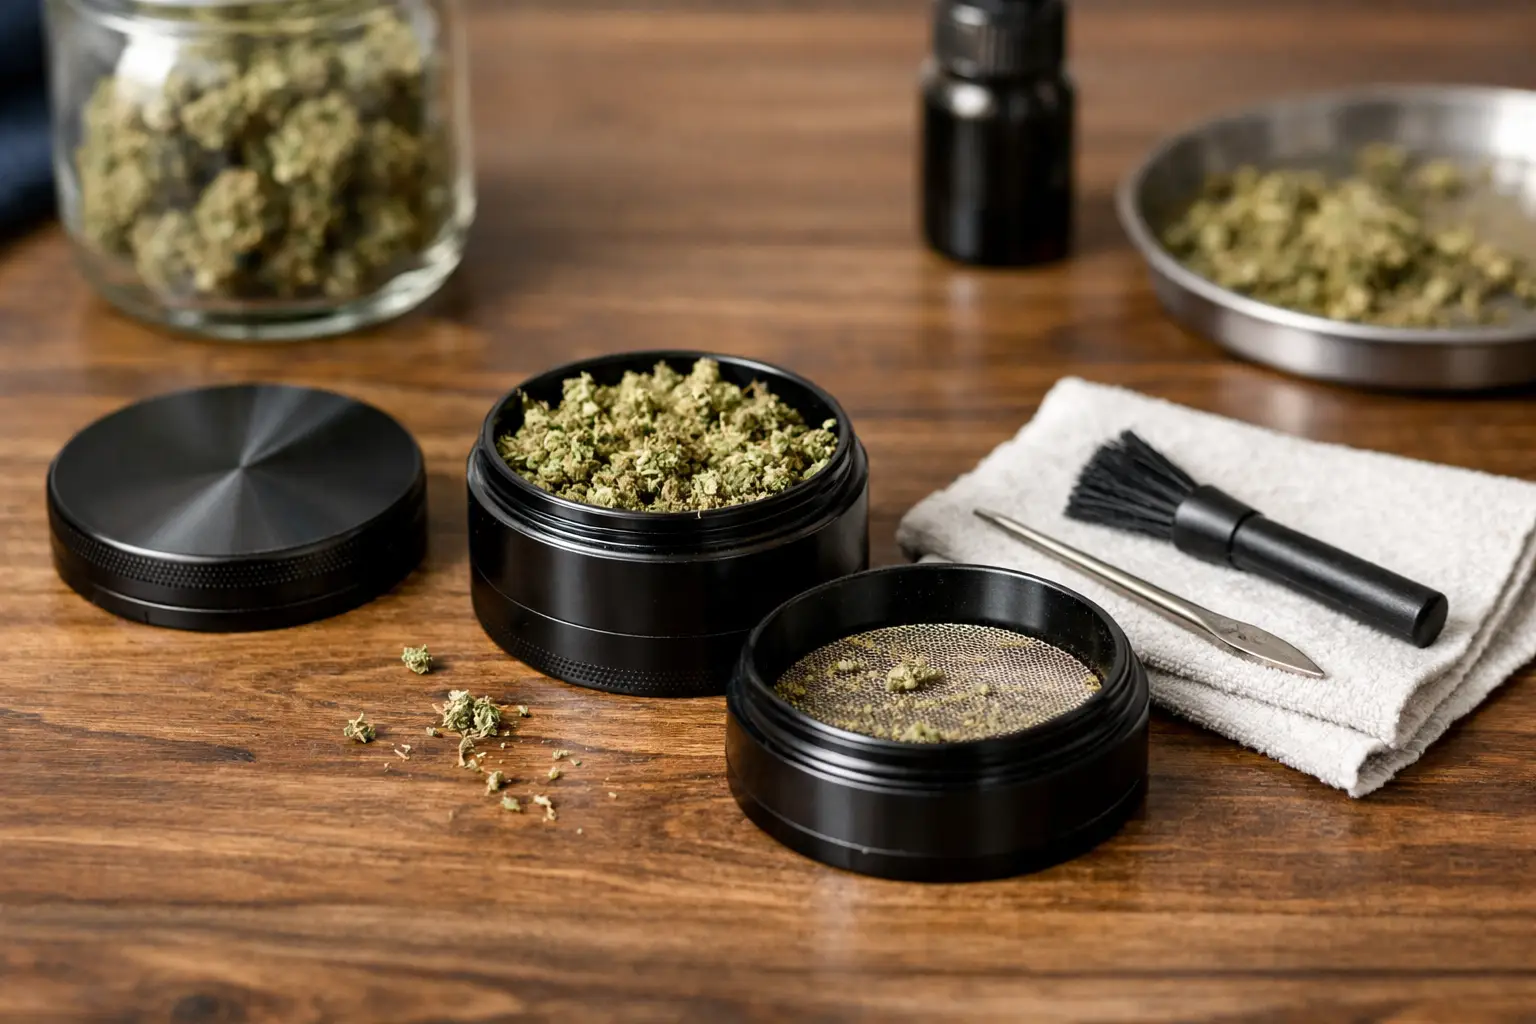
What you actually need
You do not need a drawer full of gear. A small soft-bristle brush, cotton swabs, a microfiber cloth, and isopropyl alcohol are enough for most deep cleans. Warm water can help with certain non-resin-heavy messes, but alcohol is usually more effective on sticky buildup. If you want to avoid scratching finished surfaces, skip metal picks and anything abrasive unless you are being extremely controlled.
How to clean a weed grinder without damaging it
Start by fully disassembling the grinder. Separate each section and tap out any loose material onto a clean surface. A soft brush should always be your first move. You can remove a surprising amount of plant matter from teeth, chamber walls, and screen areas without introducing any liquid.
After dry brushing, inspect the trouble zones. The most common problem areas are the teeth bases, lid rim, chamber edges, and screens on 4-piece grinders. If residue is still stuck, dampen a cotton swab or cloth with isopropyl alcohol and work carefully over the buildup. The goal is to dissolve resin, not flood the grinder.
For heavier cleaning, wipe each part thoroughly and let the alcohol break down stubborn spots for a minute before brushing again. If your grinder has a screen, be patient. Screens can clog slowly and clean slowly. Scrubbing too hard can do more harm than good, especially if you are trying to preserve long-term performance.
Once the residue is removed, wipe every part dry and let the grinder air out completely before reassembly. That last step matters. Reassembling while any alcohol remains can leave odor behind and trap moisture where you do not want it.
Freezer method, soaking, and other common cleaning advice
People love hacks, but not every grinder cleaning trick deserves equal trust.
The freezer method can help with sticky residue because cold temperatures make resin more brittle. If your grinder is especially gummed up, placing the disassembled parts in the freezer for a short period can make brushing easier. This works best as a first step before dry cleaning, not as a replacement for a real deep clean.
Soaking is more situational. A controlled soak in isopropyl alcohol can be effective for heavy buildup, but it depends on the grinder’s material, finish, and construction. For a premium aluminum grinder, aggressive soaking should not be your default if a brush-and-wipe approach gets the job done. The less unnecessary stress you put on the finish and fitment, the better.
Boiling, harsh detergents, and random household degreasers are where people get careless. Heat can affect components and finishes. Harsh chemicals can leave residues you do not want anywhere near your herb. A grinder is not cookware. Clean it like precision hardware.
How often should you clean your grinder?
If you use your grinder daily, a light brush-out every few uses keeps buildup from snowballing. A deeper cleaning every two to four weeks is a practical range for most people. If you are grinding especially sticky flower, you may want to shorten that interval.
If you use your grinder occasionally, you can go longer, but do not confuse low use with no maintenance. Resin can still harden over time, and old buildup is always harder to remove than fresh residue.
The smarter rule is performance-based maintenance. When rotation changes, clean it. When the teeth stop cutting cleanly, clean it. When the screen starts looking blocked, clean it before you lose efficiency.
Maintenance mistakes that shorten grinder life
Most grinder damage does not come from normal use. It comes from bad cleaning habits and avoidable force.
The first mistake is scraping with hard metal tools. Yes, they remove residue fast. They can also nick teeth, mark surfaces, and compromise the clean contact points that make a grinder feel precise.
The second is overpacking. Stuffing too much herb into the chamber increases resistance, encourages uneven grinding, and pushes more material into places where buildup starts. A grinder performs better when the teeth can actually work.
The third is twisting through resistance instead of stopping to clean. If the grinder suddenly feels tight, forcing it only compounds the problem. That pressure can stress the fit, grind residue deeper into the moving surfaces, and make the next cleaning harder.
The fourth is neglecting the screen. On 4-piece grinders, the screen needs a gentler touch than the main chamber, but it still needs attention. Letting it clog for too long reduces function and creates a slow drop in overall performance.
Storage matters more than people think
A clean grinder can still collect problems if it is stored carelessly. Keep it in a dry place, away from dust and loose debris. Tossing it into a bag with lint, crumbs, or random accessories is an easy way to contaminate the surfaces you just cleaned.
It also helps to avoid leaving ground herb sitting in the grinder for long stretches. Short-term storage is one thing. Letting material sit for days or weeks is another. The longer it sits, the more oils and fine particles settle into the chamber and around the teeth.
If you want your grinder to stay smooth, store it empty or close to empty whenever possible.
Grinder design changes maintenance demands
Not every grinder needs the same level of attention in the same places. A 2-piece grinder is straightforward. Fewer parts mean fewer places for buildup to hide. A 3-piece or 4-piece grinder gives you more separation and function, but also more surfaces to monitor.
Threaded grinders need close attention around the threads because residue there can create a gritty, frustrating feel. Thread-less magnetic designs eliminate that specific issue, which can make routine upkeep simpler and reduce one of the most common failure points in lower-end grinders. That does not mean maintenance disappears. It means the cleaning focus shifts more toward teeth, rims, chamber walls, and screens.
Material quality matters too. Precision-machined 6061-T6 aluminum holds up better than bargain construction, but no material is immune to neglect. Better engineering gives you a stronger platform. Maintenance keeps it performing at that level.
The standard for long-term performance
A grinder should not feel disposable after a month of real use. If it is machined correctly, assembled correctly, and maintained correctly, it should keep delivering a consistent grind, clean rotation, and dependable fit over the long haul. That is the difference between buying a random accessory and owning a tool built for repeat performance.
Tahoe Grinder Co builds grinders with that long-view mindset, and maintenance is part of honoring that standard. Keep it clean, avoid careless force, and handle buildup before it turns into drag. A good grinder earns its place every session, but only if you let it work the way it was designed to.
Treat grinder maintenance like part of prep, not a repair job. The payoff is simple – better feel, better consistency, and a tool that keeps performing like it should.